18 Jun 2017
This weekend I decided to re-visit web development by looking at Gulp and React. A friend and me did this project where we wanted to create small and shiny utility web apps with React. Most of the tools out there are not the easiest to use and visually not that appealing to put it mildly. So, we created an isomorphic/universal Express/React setup and created half a dozen of tools or so, ranging from a weather, white noise and country code lookup tool.
We hosted the solution on DigitalOcean. The site has run for a couple of years now, but occasionally crashes. Now, it’s been down now for a couple of months. Motivated by this, I’ve started to investigate the possibility of simplifying the tooling, separating the backend and frontend and migrating that site over to GitHub pages.
The first step is the tooling. We want some tasks that take the source code and transform it into a static web page. We also want each subpage to support React components. To do this transformation I decided to use Gulp. One of many task runners out there. In Gulp 3.9.1 you define tasks using ECMAScript 5 (JavaScript ES5). However in Gulp 4 you’ll be able to do so with ES2015 (JavaScript ES6). Below you can find a small recipe on how to utilize ES2015 with Gulp.
New Project Using Gulp with ES2015
- Create a new project by
npm init
- Install gulp v4:
npm install gulpjs/gulp.git#4.0
- Install Babel:
npm install --save-dev babel-register babel-preset-es2015
- Create a
.babelrc file, and add:
{
"presets": [ "es2015" ]
}
- Place your gulp tasks in a file named
gulpfile.babel.js, to avoid some potential issues.
You’ll now be able to define tasks using ES2015! For instance, you can use const, let and import. In addition you can define tasks using named functions. A lot of details can be found in Gulp’s v4 branch README file.
Pitfalls
Trying to convert gulp tasks from various ES5 samples can be challenging. They’ve changed the task execution system in Gulp v4. Previously you had to specify the order of execution by adding dependencies to the task’s method signature. For example in task, gulp.task('build', ['clean', 'concat']), the task clean and concat have to finish before the build task can start. In Gulp v4, you instead specify the order of execution by using gulp.parallel and gulp.series. This article explains how to specify dependencies for a Gulp v4 task well.
Sample
This weekend’s effort can be found on my GitHub page. The result is a very primitive static web page generator that supports React components, where Gulp tasks have been written with JavaScript ES2015. The repository can be found here
17 Jun 2017
Command-line interface shortcuts can be real timesavers. I use the Atom text editor frequently for projects, or changing text files. It’s fast and versatile. If you’re using Git from your command-line interface, this tip can save you some time opening Atom to the correct project directory.
Basically, if you usually navigate around your file system using command-line, having a way to open Atom to your working directory would be great. This will save you time, since you avoid having to deal with navigating in the pesky GUI file dialog.
Simply, cd into the folder you want opened in Atom, and write:
That’s all. Atom will start and have every file and subdirectory available in the left-hand-side Project view. Furthermore, you can also open a file in Atom with the same method, by replacing the dot with a path to a file. For instance atom ./example.txt.
15 Jun 2017
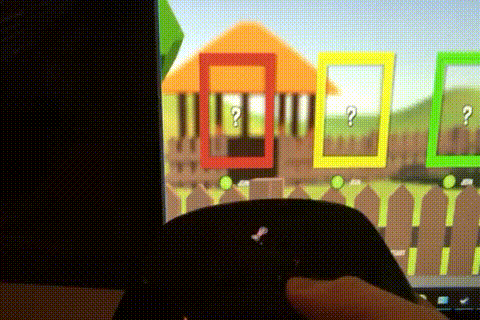
My current Unity game is a 4 player couch game. It’s a turn based ball game, where each player tries to knock another player’s ball into a hole. Whose turn it is to control the ball is of course decided by a virtual match of rock paper scissor. The input device each player will use is therefore a game controller. Unfortunately, I only have Steam controllers, which turned out to be a bit harder to use with the Unity Editor, because the Steam controller works best within the Steam application. It is, however, possible to make them work as gamepads inside the Unity Editor.
The trick is to add Unity as a non-Steam game to your Steam library.
Use Steam Controller in Unity Editor Recipe
1. Add Unity to your Steam library
- Open Steam
- Find Games in the Menu bar.
- Click
Add a Non-Steam Game to My Library...

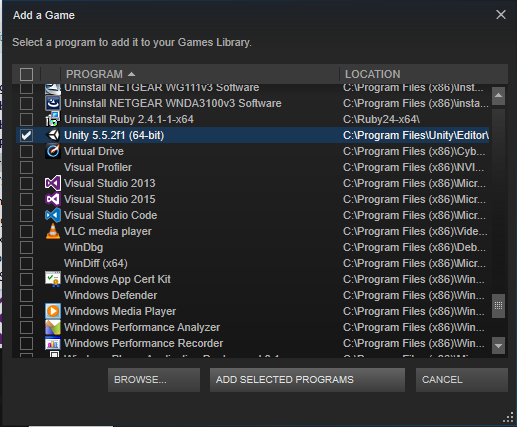
- A browser will appear. Here you can either scroll to find Unity in the list of programs, or browse to find Unity. On Windows, Unity is often located at
C:\Program Files\Unity\Editor\Unity.exe
- After you’ve added Unity to your Steam library, open
Big Picture.
- Make sure your Steam controller is on, and connected to Steam.
- Find Unity in the library, and open it.
- Then, open
Controller Configuration
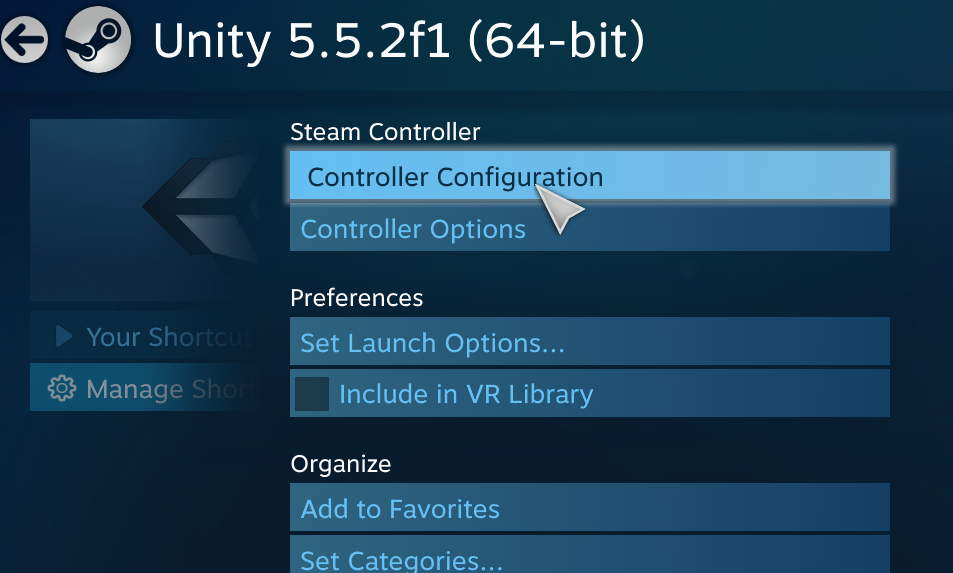
- Change the controller configuration to
Gamepad. The configuration can be found in Templates.

3. Open Unity from Steam
- Then you’re done. You are now able to use your Steam Controller as a regular joystick input device inside the Unity Editor. Just remember to open Unity from your Steam library.
14 Jun 2017
Thought I might share some practical software development tips and tricks once in a while. This can be things I’ve recently discovered and found neat, or things I use daily at work.
Today’s timesaver I actually discovered not too long ago. Something I’ve managed to miss. In Git, if you do git add -A, Git will stage all the changes you’ve made. However, if you then want to see the changes you’ve made, you can’t simply do git diff afterwards. This only works for unstaged files. To look at the staged diff you can do: